What if you could use your favorite keyboard away from your computer?
A long time ago I learned about an interesting “text editor”. Its main feature was, uhh, the lack of text editing. That’s right, you can’t change anything you’ve typed.
The idea behind it is very interesting. It’s about two modes of writing. One where you produce as much text as possible, without trying to organize or correct it in any way. The other one is where you edit and restructure the text until it’s consistent and easy to read.
Doing the first part on modern computers is a challenge for me. I get distracted very easily. I’m also tempted to start editing right away, often times ending up in a loop rewriting a sentence over and over again.
Old typewriters don’t have this problem: there are no distractions and no way to edit the text.

Implementation
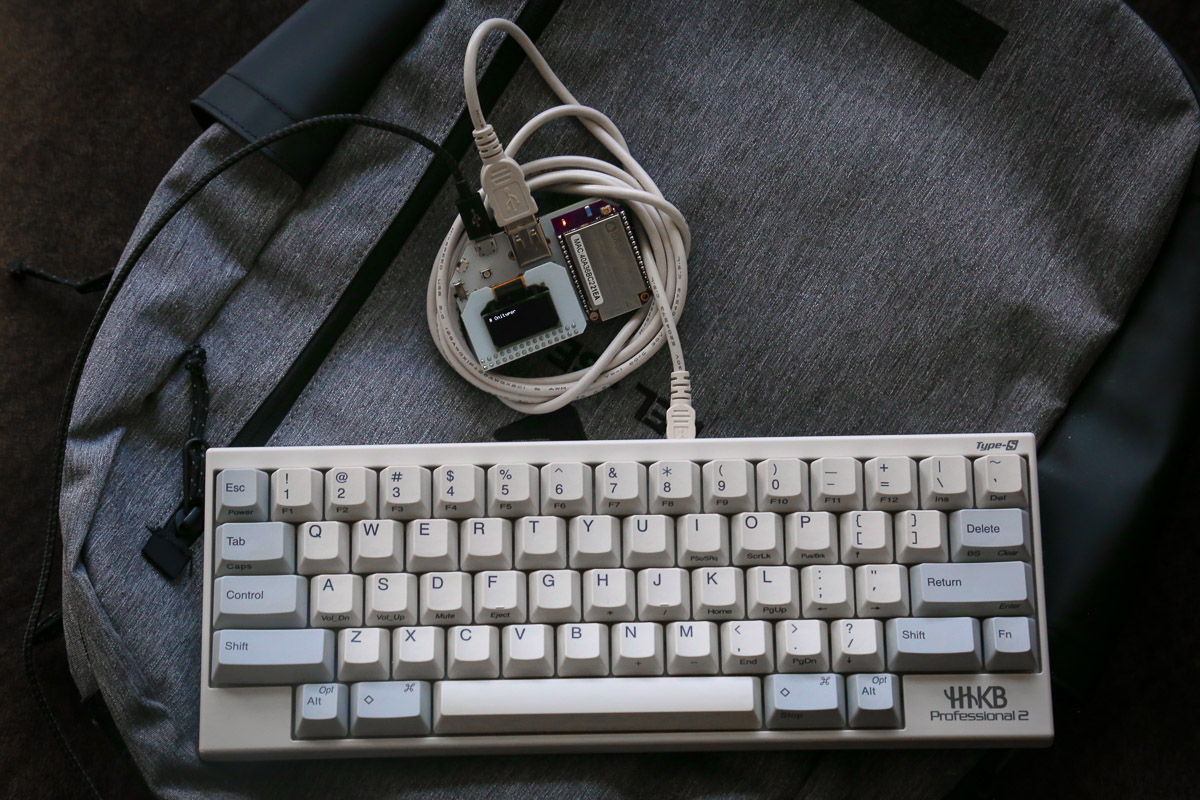
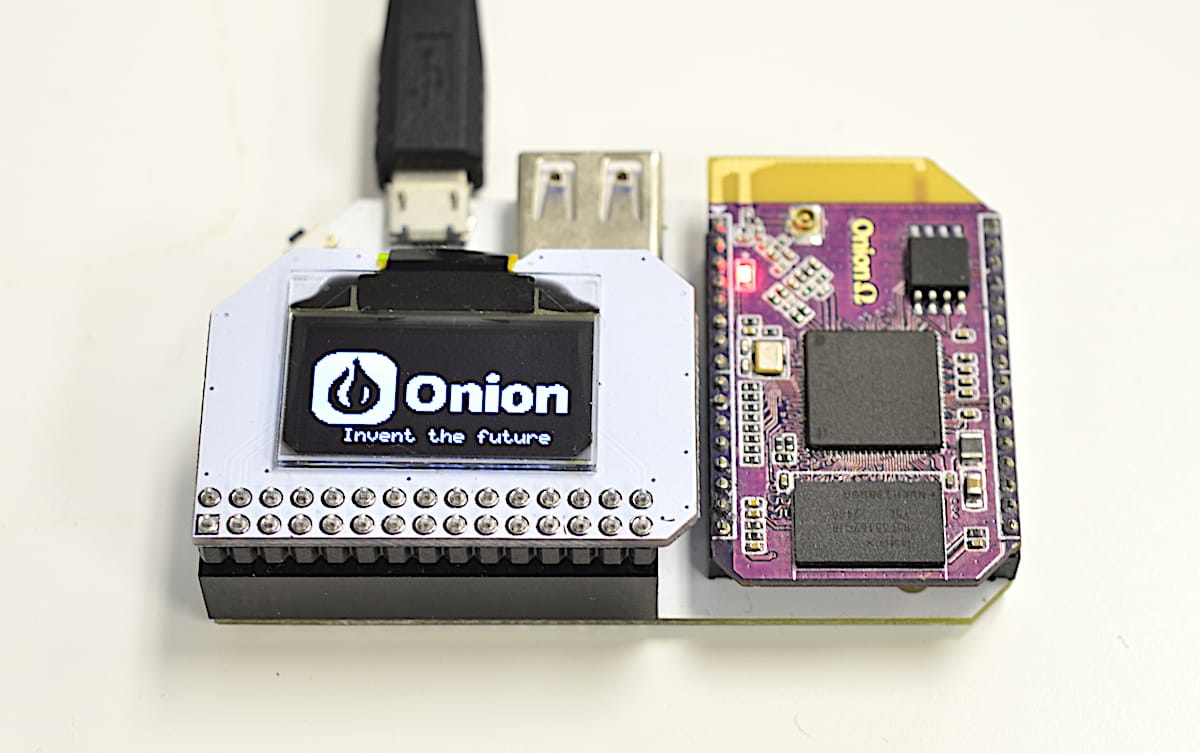
On my last birthday I got a tiny device, Onion Omega 2+. It’s like Raspberry Pi, runs Linux, but built on different architecture and has its own set of accessories. It came with 21x7 chars OLED display extension.
The idea was to connect my favorite keyboard (HHKBPro2 type-S) via USB to the Omega2. Anything I type there should immediately show up on the built-in OLED display and sync to “the cloud”.
I bet I can hack this together with 1 line of bash.
– me, two weeks ago
I thought it would be trivial, just read the keystrokes, pipe them to OLED and a text file, sync the text file over Dropbox.
However, it turned out to be much more complicated than that :)
First, I couldn’t find a trivial way to read the text off of the keyboard. I was looking for something like getc that can get data from a connected USB device, but no luck. Instead I found out that Linux has /dev/input/event* files where I could read raw events. That lead me to the ancient input.h, which I used to hack together a simple parser.
Next, printing this stuff to OLED also had gotchas. My initial version would just repaint the screen on every keystroke, which turned out to be very inefficient. Full display repaint using Omega’s OLED APIs takes as much as 400ms, totally unacceptable for a good experience.
So I changed the code to keep track of cursor position and advanced it as more characters were being printed on the screen.
This got more complicated once I added support for backspace. And then even more complicated with paging. When I got to implementing word wrapping, it was too much — there are so many different states to transition between!
Ideally, I don’t want to track the current screen position and code the drawing logic for each editing command. I want a model where I can define piece of state (the text) and a function that defines what this should look like on the screen, without worrying about the underlying OLED API performance.
Does it remind you of anything? :)
React. I love this model and I’m sure there are tons of applications for it outside the web development. Here’s what my code looks like now:
def render(text)
  # Return the text I want to be on the screen
end

next_screen = render(message)
reconcile(prev_screen, next_screen) do |row, col, text|
  oled_command "cursor", "#{row},#{col}", "write", text
end
prev_screen = next_screen
The latency between pressing a button and seeing it on the screen is amazing. I used iPhone X slow motion camera (240fps) to measure time from keyboard button down to seeing visual feedback on the screen. Here are the numbers:
- HHKB connected to macOS running Sublime: 84ms latency
- HHKB connected to onion running onityper: 32ms latency
This number matters a lot. The lower the number, the more natural and instant is the experience. 32ms is great!
See also: Keyboard latency and Typing with pleasure.

Sync
Everything I type on this device is stored in text files. It’s not very easy to pull these files from the device, so I also added some code to upload each line to the server.
On the backend I used Firebase. I have a simple “cloud function” that takes text as input and stores it in Firestore. I also have a very simple frontend that renders the text from the Firestore.
The tricky part is that I can’t completely rely on available internet connection. I plan to take this device to coffee shops and places outside of WiFi reach. The script stores a queue of lines to upload in a file, so even after device restarts it should be able to resume uploads.
Ideally I’d love to use Dropbox, but unfortunately I couldn’t find linux MIPS build of their client.
Testing
In retrospective I should have started with proper Ruby tests, but yak shaving and curiosity brought me to cram. It’s a simple CLI tool that takes *.t files as inputs. These files contain shell commands and the expected output.
The development experience of cram is pretty good. You don’t need to set the “expected output” beforehand. You can just run the tool and it will show the difference between expected and actual output, with an option to update the *.t file.
Very similar to Jest snapshot tests.
Deployment
Omega’s WiFi has been terrible in my experience, lots of random disconnects. I couldn’t rely on SSH because of that and had to use serial port with screen. This made the deployment process more complicated, there’s no scp for terminal connection.
Here’s a clever trick I learned:
screen -S $SESSION -X stuff 'cat > /root/onityper.rb <<\EOF'$'\015'
screen -S $SESSION -X readreg p "$ROOT/onityper.rb"
screen -S $SESSION -X paste p
screen -S $SESSION -X stuff 'EOF'$'\015'
I can run screen in one tab and while the connection is active I can send commands to it. stuff sends keystrokes and readreg/paste can simulate typing large chunks of text.
To run the script on every boot, I used the official instructions which recommend putting stuff into /etc/rc.local.
ruby /root/onityper.rb >> /tmp/onityper.log 2>&1 &
I don’t like this at all. There must be a proper way of defining a service that can run in background, with policies about logs and log rotation, when to restart it, etc. Looks like OpenWRT has procd but at that point I was too lazy to look into.
Code
Warning: it’s a bag of hacks. See it on GitHub.
Next
I’m very happy with this setup so far. I bought the cheapest powerbank I could find on Amazon, so the device is pretty much independent from my laptop. 70% of this post was created on the Onityper from a coffee shop.
Now I want to use a 3D printer to build a case for it.